On Neutrinos Studio, you can reuse the user interface of a page on another page in the form of views. A view represents the content that is displayed to the user. When an app is deployed, every page is called a view.
For example, let us assume that you have created an app with a view that includes a set of address fields. If you want to create a second view that needs the same address fields, you can reuse the first view. In both cases, the app is using an instance of the view.
You can edit the properties of each instance independently. For example, changing the label of one view instance does not change the label of the other. Both view instances use a reference to point to the view definition. This means that if the view definition changes, you can see the change reflected in the instances of the view as well.
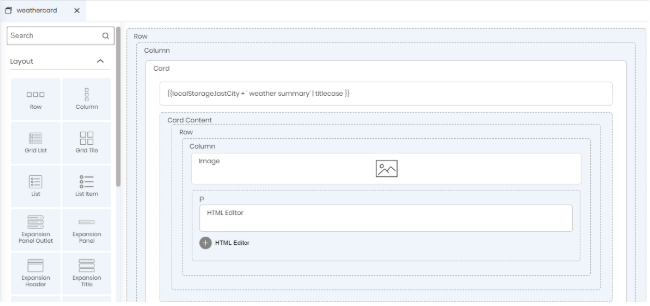
Consider an app with 2 pages weathersearch and weathercard.
To create a view of weathercard in weathersearch page, you perform the following steps:
Open the weathersearch page.
Navigate to the Views section.
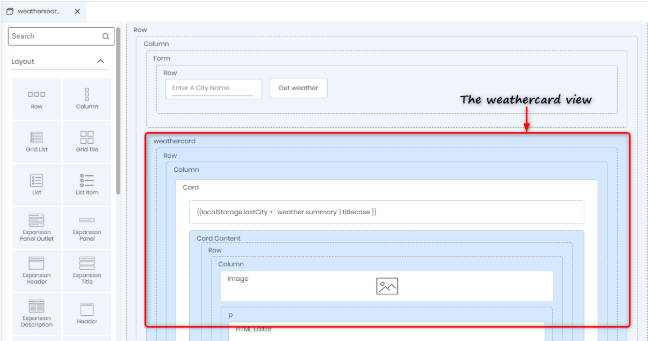
Drag and drop the weathercard view to the weathersearch page container. You will see that the Studio creates an instance of the weathercard page on the weathersearch page.
Cyclic dependency is checked. That is, if you create a view of page weathercard in page weathersearch, you cannot create a view of page weathersearch on page weathercard. This creates nested dependency. Therefore, Neutrinos Studio does not allow such dependency and throws an error message if such dependencies are encountered.

You cannot drag and drop components into a view, or delete components from a view. Modifications, if any, has to be made to its original page.
Any data to be passed between views is performed using the Input and Output properties. In general, the input and output properties of the child view will be displayed in the Advanced Properties section of the parent view's Attributes window.
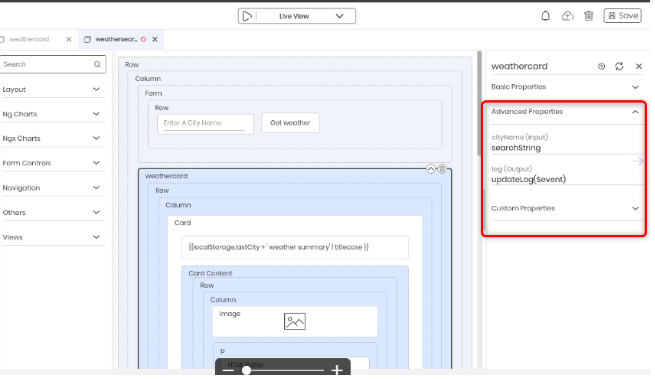
Data from the parent view is shared with the child view by using the Input property of the child view. You create this property in the TS editor of the child page using the @Input() decorator.
Consider an app with 2 pages weathersearch and weathercard where you need to get the city Name property value of weathercard from weathersearch.
The weathersearch page provides an input field where you input the name of the city for which you want to check the weather. The weathercard page displays the weather of the city entered in the weathersearch page. This can be achieved by making use of views. You will declare an input property cityName in weathercard which will be bound to the property searchString of the weathersearch page.
To create the Input property cityName in the weathercard view, you use the @Input() decorator in the TS editor of the weathercard page:
JavaScript |
() cityName: string; |

Data from the child view is shared with the parent view by using the Output property of the child view. You create the Output property in the TS editor of the child page by using the @Output() decorator.
The parent can listen to the event by using event binding. This approach is ideal when you want to share data changes that occur on actions like button clicks, form entries, and other user events.
For example, to create a Output property in the weathercard view, you create the property using the @Output() decorator in the TS editor of the weathercard page. We will use this output property to emit the result of the weather search.
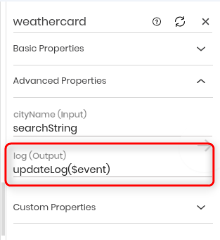
In the screenshot above, notice that the name is displayed in the Attributes window of the weathercard view. This is because while declaring the property in the TS editor of the weathercard page, we had entered log as the name to be used in the template.