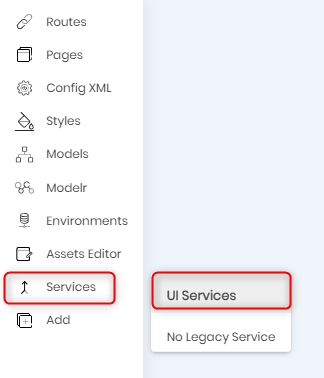
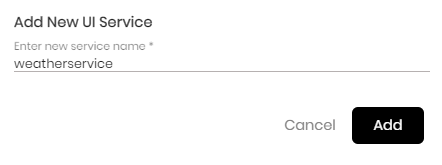
 icon to add a Client Service. Enter weatherservice in the popup window and click Add.
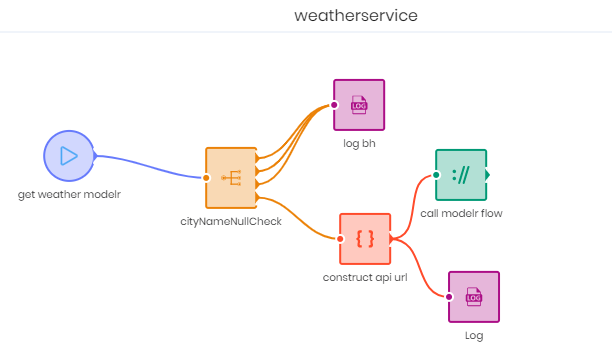
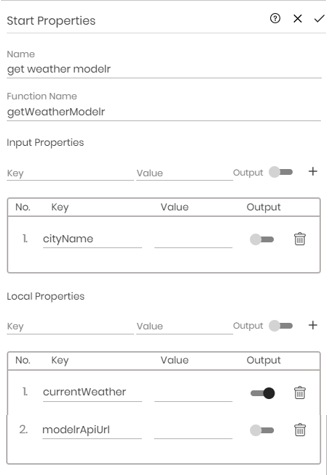
Double click the node to open its Attributes window. Add the following details:
| Property | Value | Action |
| Name | get weather modelr |
|
| Function Name | getWeatherModelr | |
| Input Properties -> Key | cityName | Click + to add the property to the list. |
| Local Properties -> Key | currentWeather | Toggle Output to true. Click + to add the property to the list. |
| Local properties -> Key |
modelrApiUrl |
Click + to add the property to the list. |
The currentWeather property is used to capture the result returned by the Modeler flow. It is set as an output property and can be accessed outside the flow.
| Property | Value |
| Name | cityNameNullCheck |
| Property -> bh.input | cityName |
Set the following conditions. After entering each property, click + Add to add the condition to the conditions list.
| Condition | Value |
| is of type | undefined |
| is null |
|
| is empty |
|
| is of type | string |
Select stopping after first match from the drop-down list at the end of the attributes window.

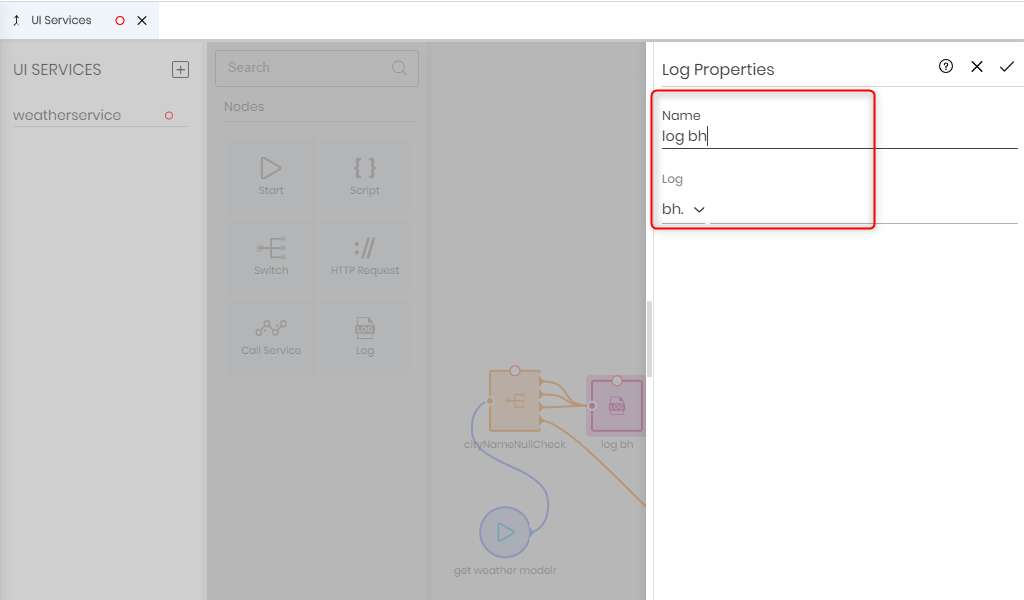
| Property | Value |
| Name | log bh |
| Log | bh.
|
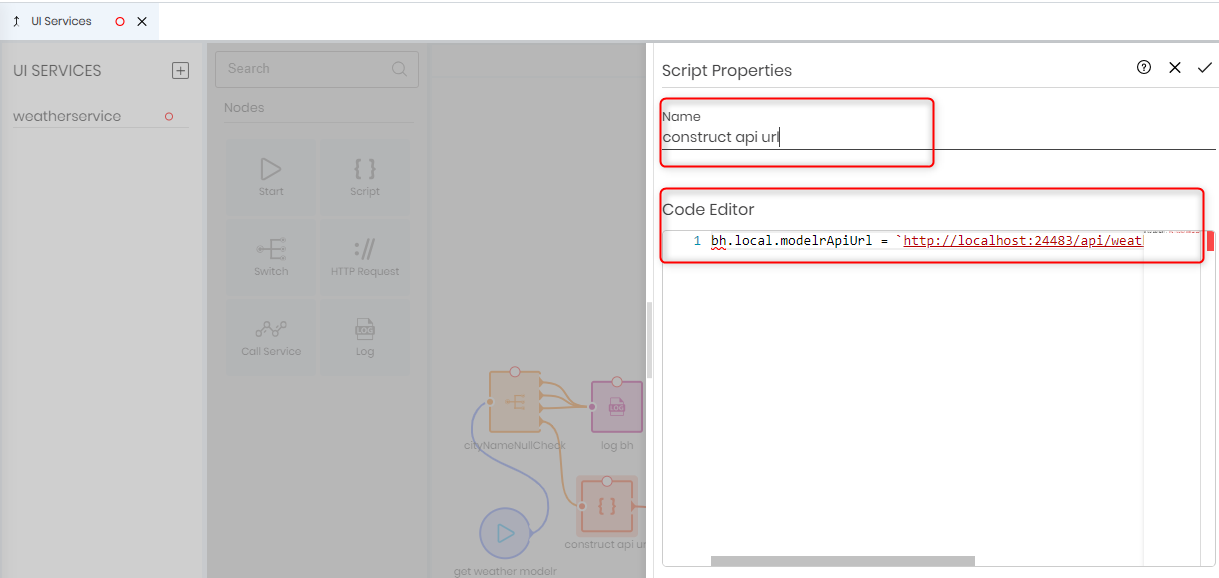
| Property | Value |
| Name | construct api url |
| Code Editor |
bh.local.modelrApiUrl = `http://localhost:24483/api/weather?cityName=${bh.input.cityName}`;
|
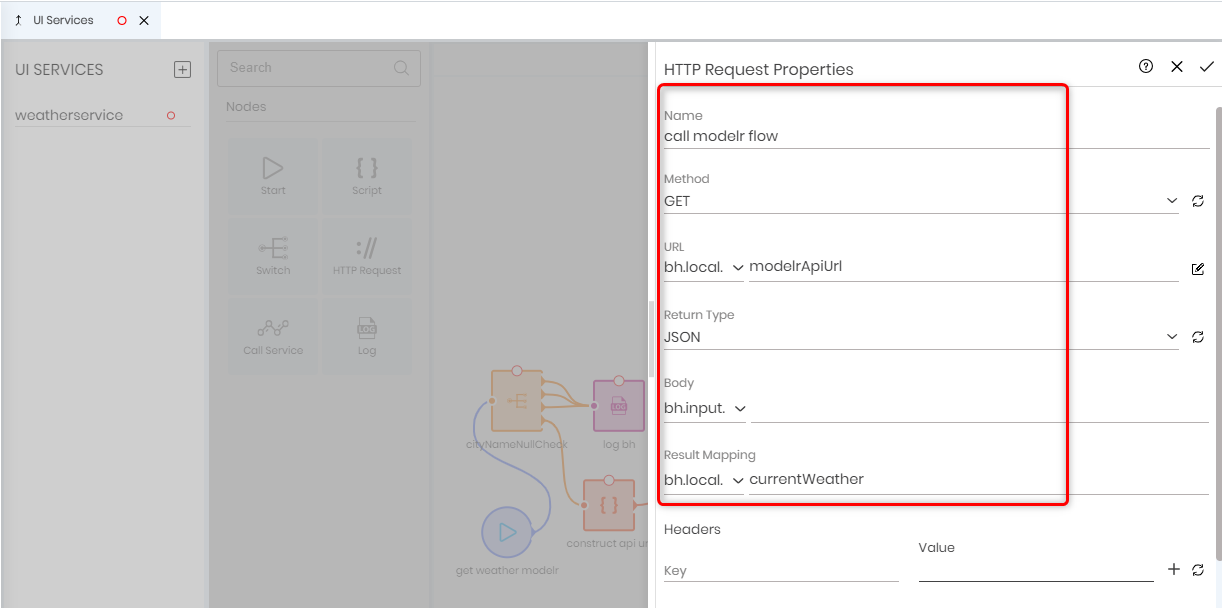
| Property | Value |
| Name | call modelr flow |
| Method |
Get
|
| URL | Select the bh.local property, and enter modelrApiUrl as the value. |
| Return Type | JSON |
| Body | bh.input. |
| Result Mapping | bh.local.currentWeather |
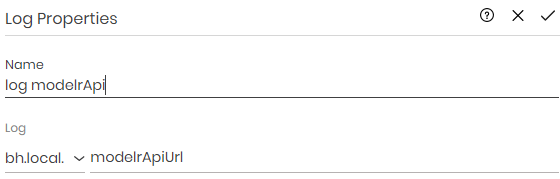
| Property | Value |
| Name | log modelrApi |
| Log | Select bh.local property, enter modelrApiUrl as the value |